+ Reply to Thread
Results 1 to 8 of 8

Thread: Horizontal flow scrubber build step-by-step.

  1. #1

    Join Date
    Feb 2013
    Location
    USA
    Posts
    32

    Horizontal flow scrubber build step-by-step.

    I've been playing with algae scrubbers for a few years now, and have built about two dozen dedicated and more than a couple of hybrids. I started with a converted HOB AquaClear filter, which worked to a degree. I've built and tried almost every iteration of lights, collector materials, scrubber configurations, you name it. I'm retired, so I have plenty of time to tinker. I've also kept saltwater since the early 1970's, and have literally tried every type and style of filtration ever imagined in the last four+ decades. Currently, I'm running 3 tanks using only this design scrubber. No skimmers, no sumps, no complicated anything. One is a 55, one is a 33 long, running as reef tanks, and a 40 breeder running as a frag farm.

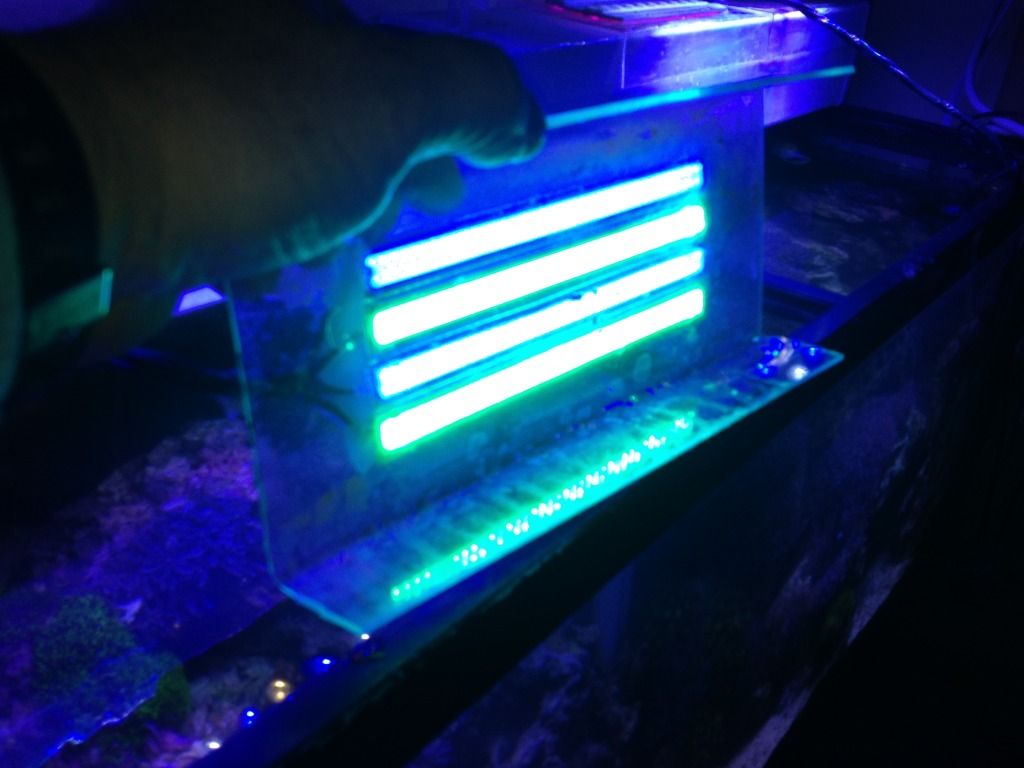
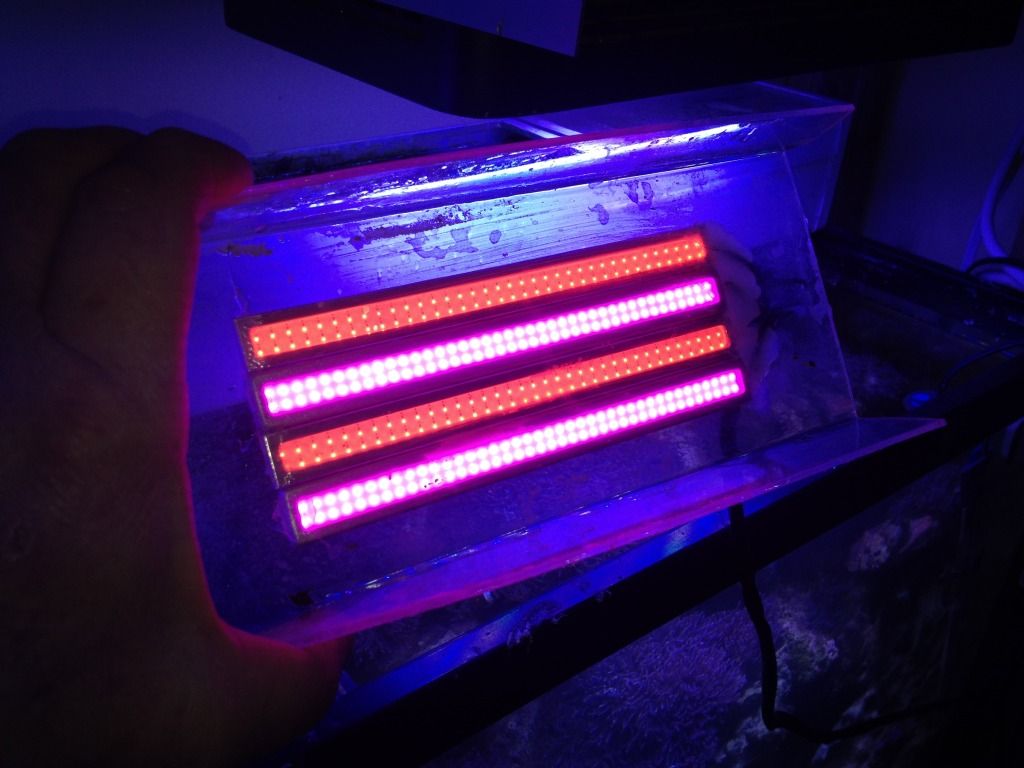
    As a result of research conducted by myself, the academic community, and on boards like this, I have arrived at what is, for me, an optimal design. Over the next couple of days I'll be building one for a friend's 120 gallon. One of the game changers for all of us that use scrubbers have been LED's. Again, I've explored dozens of both pre-built and custom built arrays. I've also tried various wave lengths and intensities to determine what worked best for me. eBay has been my primary source for these Chinese made LED's, dimmers, controls and the like. Designing and building these arrays have taught me a lot, and I'm always monitoring new iterations of LED designs. I recently ran across something that has been a game-changer in my builds. In the grand tradition of re-purposing stuff carried on by aquarists since time began, I'm using COB (chip on board) LED's manufactured and intended to be used as Daytime Running Lights for automobiles. They are CHEAP, reliable, and easy to adapt to my scrubber builds. I think that anyone considering a DIY build should consider these puppies. They can be found in every needed color (wavelength) to build out a scrubber. By combining various colors and numbers of COB LEDs, I have found them to have several advantages:

    1. They are dimmable.
    2. They require minimal heat-sinking.
    3. They are in the correct wattage range for most any scrubber.
    4. They run on 12v. I'm using re-purposed wall wart type power supplies salvaged from an electronics recycler I know.
    5. They are, for the most part, water-proof. I'll show in the build-out photos what has to be done to make that 100%
    6. Compared to every other fixture or DIY setup, they are the cheapest, most economical way to go.

    They do require a little modification to be used, but that's related to the electrical connections.

    Here are the links to the ones I have found to be useful.

    http://www.ebay.com/itm/111434973041...%3AMEBIDX%3AIT

    http://www.ebay.com/itm/111434978016...%3AMEBIDX%3AIT

    http://www.ebay.com/itm/141797004300...%3AMEBIDX%3AIT

    http://www.ebay.com/itm/191284455766...%3AMEBIDX%3AIT

    I have a set of them to be delivered tomorrow for this build. I'll keep posting this week as I build it. If anyone out there likes what I've designed, they will be available as either a DIY kit or complete units in the next few months.

  2. #2

    Join Date
    Jun 2015
    Location
    Canada
    Posts
    168
    ...I have arrived at what is, for me, an optimal design.
    Photos of an existing example? It would be helpful to have an idea of what you're building. Thanks.

    Do you have actual wave length numbers for the LEDs you link to? Great prices! How do you wire them to a wall wart? Any particular wall wart you use and recommend for these particular LED units?

  3. #3

    Join Date
    Feb 2013
    Location
    USA
    Posts
    32
    Quote Originally Posted by amwassil View Post
    Photos of an existing example? It would be helpful to have an idea of what you're building. Thanks.
    >>>>I'll be taking photos as I build. I'll also post photos of one of my current prototypes I'm testing.

    Do you have actual wave length numbers for the LEDs you link to?
    >>>>Yes, I managed to get in touch with the actual manufacturer in China. The pinks are 380nm~850nm, hitting red and blue spectrums. The reds are 660nm deep red. The blues are available in 435nm and 475nm. The green is 525nm.

    Great prices! How do you wire them to a wall wart? Any particular wall wart you use and recommend for these particular LED units?
    >>>>As far as wall warts, I've been using anything I can find that is 12V and at least 1 amp, 2+ amps are better. The LEDs draw approx 1/2 amp for each strip. I just cut the 12v plug end off the power supply and direct wire it to my dimmer. Lights are wired to the dimmers other terminals. This CCTV power supply would run up to 4 LED strips. http://www.ebay.com/itm/12V-2A-AC-DC...kAAOSwstxVRbm4.

    I'll be posting photos of each step in the construction of the scrubber. LED's are supposed to get here today, so tonite I'll start building. I'll post how to set up the LED arrays, and explain why the different colors of LEDs
    Last edited by Creekview; 01-22-2016 at 12:30 PM.

  4. #4
    Administrator
    Join Date
    Oct 2008
    Location
    Salt Lake City, Utah, USA
    Posts
    10,576
    Those are nice packages of 6 real LED watts.

  5. #5

    Join Date
    Feb 2013
    Location
    USA
    Posts
    32
    Quote Originally Posted by SantaMonica View Post
    Those are nice packages of 6 real LED watts.
    I've found two sufficient for small scrubbers, one pink and one red. The real plus for me other than price and simplicity is they virtually eliminate screen burn. It's a nice, even glow.

  6. #6

    Join Date
    Feb 2013
    Location
    USA
    Posts
    32

    Build update

    The LED shipment from China got held up in Customs in Chicago, and didn't arrive until yesterday. We're snowed in here today, so I'm going to post some photos of my current prototype, and give some background on my design and some of its features. The prototype I describe and illustrate here has been in service exactly 30 days as of today.

    First, what I've been building for the last few months is far more that just an algae scrubber. It's more of a filtration system and refugium/food farm in one unit. I've been running scrubber-only tanks for 3+ years now, and have been through multiple build iterations. These "dirty water" systems have proven to be the most stable and maintenance free aquariums I've ever owned. My goal for this particular design is to provide total system filtration, and completely eliminate complex and expensive plumbing such as sumps and skimmers, while providing a place for natural systems to evolve. One of the benefits of these horizontal flow scrubbers is they quickly populate with all kinds of critters. I have mysis shrimp, copepods, rotifers, phyto and zooplankton generated continuously in the system. Free, all natural food.

    Here are my design goals for this project:
    Use only off the shelf bits and pieces.
    Design and build something that the average handyperson could source and build themselves.
    Create a "fault tolerant" system that could provide complete system filtration in the absence of any other form of filtration.
    Be simple and easy to maintain.
    Not cost a fortune.
    Have a low power consumption that could be run on battery power during outages.

    I have to confess that the seed for this design came from another user on another forum. He had built an over-the-tank refugium out of a length of 4"x4" PVC fence sleeve from a hardware store. Using plastic end caps glued on each end and one side cut away to provide access and some pvc plumbing he made a very functional refugium. Regarding the PVC post sleeves, I've tried a couple of different sources. Lowes has the best I've found. http://www.lowes.com/pd_24992-73428-...nyl+fence+post It's much more substantial than others and also has very sharp, square corners. Easier to mold the lexan access covers to the square shape.

    I built one, and tried it out strictly as a refugium. Worked just fine. About the same time I started playing with algae scrubbers. My first was a converted HOB AquaClear110. It worked to a degree. I had to change housing and move to another apartment and in the process added another tank. I built an offset scrubber that handled a 33 long tank mounted above a 55. Made out of a 5 gallon aquarium, it served extremely well for 2+ years. The impetus for this current series of designs was the desire to fire up a frag farm in a 40 breeder. I went back to the PVC fence post sleeve concept, and built a 36" long over the tank with a scrubber in one end and a box of 1 1/2" Cermedia balls in the other to provide biological filtration since the frag farm would have minimal live rock and a bare bottom. I'll post photos of that system as well.

    The photos below are of the latest prototype running on the 55 gallon reef. In this iteration I wanted to test a couple of ideas. One was to further explore the effect of LED wavelengths other than the traditional 660nm deep reds everyone uses. I had built a custom array a couple of years ago that had green, two different blues, two different reds, and two different white wavelengths. Each wavelength was on an individual dimmer so I could tune the light. I confirmed via this experiment and some research that the blue and green wavelengths are absorbed by brown and red algaes, and the red wavelengths are absorbed by green algaes. I also wanted to see if a chamber that simulated wave action typical of a tidal pool or shoreline would grow anything different. The third idea was to eliminate the mechanical pumps used in previous designs. Plain old cheap pond pumps is what I've been using. I did a bunch of research and built a very effective airlift for this prototype. All the scrubbers I build use a gravity drain. Since I was exploring several different ideas, I built this system with a center airlift. The flow tees off at the top, with the left side drained by a bell siphon. This provides the rise and fall of water across the collector and biomedia. That idea came from direct observation of tidal pools combined with some experience with fill and drain grow systems used in aquaponics. The right side is a slow flow scrubber that then flows through a weir into a separate chamber holding 1 1/2" Cermedia balls. The weir maintains a constant water level in the scrubber chamber. The left side tidal chamber holds random sized Cermedia typically used by koi pond systems. I constructed both collectors from the random sized Cermedia glued to a section of plastic egg crate. What I hope to achieve by using the different sized media is an optimized environment for both aerobic and anaerobic bacteria. Using two separate scrubber chambers also lets me try two different lighting setups. I'm currently illuminating the tidal chamber with blue/green and the slow flow chamber with full spectrum/deep red. As you'll see from the photos, I'm getting distinctly different algae grows in the two different chambers.

    Here is the 55 tank. I'm running a ton of live rock, about 3lbs per gallon. About 2/3 of the live rock started as MarcoRocks.com dry rock. The balance is uncured open ocean cultured rock I've sourced from a couple of different vendors. The best stuff came from KPAquatics down in the Florida Keys. http://www.kpaquatics.com/. I have used uncured live rock for more than 15 years, and I've never had a bad experience. Love the hitchhikers, and you can't beat the biodiversity you introduce into your system.

    This tank has been up for two years in this location, three years total. In the last two years the tank has had ONE 20% water change. I don't use RODI, I use good old Louisville tap water straight into the tank for top off. I have mostly softies right now, but there are several colonies of hitchhiker sps's that have survived and thrived. A green plate coral has reproduced multiple times. I've found babies everywhere. Stuff grows so fast I'm constantly taking frags and giving them away. There are a pair of clown fish, a yellow watchman goby and pistol shrimp, and a file fish. There is also a bonded pair of coral banded shrimp that appear at feeding time. All these critters are original to the tank setup 3 years ago. I've rotated through many fish over the years. I had to get rid of a couple of tangs last week that just flat outgrew the tank in just a few months. I also had a lawnmower blenny and a fat mandarin that I gave to a friend.


    Up top are two full spectrum LED fixtures off eBay. Between you can see the scrubber across the back of the tank. To the left you can see the dome of the bell siphon. Hanging down in the center is a 1" PVC airlift. Left and right coming out the bottom of the scrubber you will see the drain elbows.

    Here's a long shot of the scrubber system with access covers in place. Keep in mind this is a pre-production prototype. The product we hope to sell will likely be cast or injection molded. The next build for my friend will be a custom fiberglass layup.


    Below is the bell siphon dome.


    Below is a photo looking down the tidal chamber showing how the airlift provides continuous aeration of the collector.


    Here's a short video of the ebb and flow that occurs in the tidal chamber. Notice the continuous aeration.

    https://youtu.be/kVypjeKqYFM

    Here's the collector removed from the tidal chamber side of the scrubber. Most of the growth is brown slime and hair algae.


    Here's the blue/green illuminator for the tidal chamber. I just siliconed the LED's to a heat formed piece of lexan that comprises the chamber cover. I didn't bother to heatsink the LEDs, which resulted in a little warping of the cover. In the build I'm starting I'll show how to easily heatsink them using a variety of cheap options.


    A closeup of the tidal chamber collector shows all kinds of good stuff growing.


    Here's the random sized Cermedia in the scrubber afterchamber in tidal side. It is exposed to air for approx 20 seconds every 30 seconds.


    Here's the full spectrum/deep red illuminator.


    Here's the flow thru the right side, what I call slow flow.


    A short video showing the slow flow chamber. Notice the aeration of the waterflow provided by the airlift.

    https://youtu.be/gjrdESssjKw

    Here's the collector from the slow flow side on the right.


    Here's what I pulled off the collector.


    One of the Cermedia balls got over the divider.


  7. #7
    Administrator
    Join Date
    Oct 2008
    Location
    Salt Lake City, Utah, USA
    Posts
    10,576
    Very nice. (Hearing the bell and airlift operate would have been better than the music).

    All tanks should devote as much room to the natural processes.

  8. #8

    Join Date
    Feb 2013
    Location
    USA
    Posts
    32
    Quote Originally Posted by SantaMonica View Post
    Very nice. (Hearing the bell and airlift operate would have been better than the music).
    Here's a video of the bell siphon cycling. The "white noise" you hear between burps are the LED light fans. They make more noise than the airlift, which is virtually silent, as does the air pump. The pump is a typical hum that disappears in household noises. My furnace makes more noise when the burner fires than the bell siphon does. Make no mistake, a lot of work went into optimizing the siphon.

    https://youtu.be/eeevSwj9X5Q

+ Reply to Thread

Thread Information

Users Browsing this Thread

There are currently 1 users browsing this thread. (0 members and 1 guests)

Posting Permissions

  • You may not post new threads
  • You may not post replies
  • You may not post attachments
  • You may not edit your posts