+ Reply to Thread
Results 1 to 5 of 5

Thread: My nano overflow/header design

  1. #1

    Join Date
    Dec 2010
    Location
    uk scotland
    Posts
    47

    My nano overflow/header design

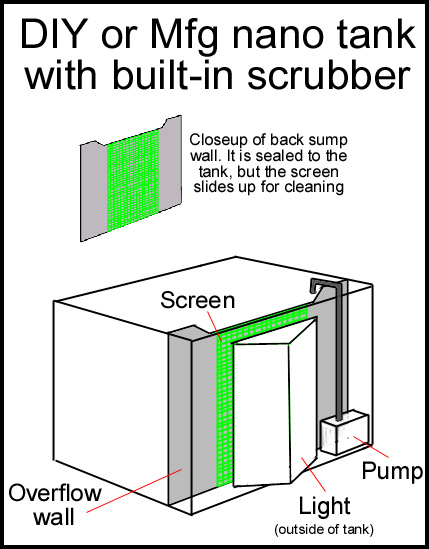
    Here's my 2ft tank seperated into an 18" display and 6" header.

    The in the vid I just used a table lamp while building my lights.
    I am now using 2x 5400k 45W photography lamps about 1 1/2" from the screen.

    I have already noticed algae growth on the screen after less that 12 hours!


    Vid


    Couple of pics for you


    Needs a little tidying up!!!


    Quick look inside the header before fitting the proper lights


    Hope you guys like my simple yey hopefully effective scrubber.

    The tank holds about 55lt of water afer the rock and sand etc.
    Has 4 1/2kg of live rock, 7kg of ocean rock which hopefully will seed and become live.
    The heater is 100w set to 24C and the pump returning the water via the spraybar is approx 1500lhr.

    The mesh screen is 10 by 5 inches so 50"sq single sided.

    Thanks, chris

  2. #2
    Administrator
    Join Date
    Oct 2008
    Location
    Salt Lake City, Utah, USA
    Posts
    10,574

    Re: My nano overflow/header design

    Well the lighting certainly is sufficient. Flow sounds good. Screen size is a little small since it's one-sided, but the lighting will probably make up for it. There will be a lot of growth in the bottom, unless you can put a shield down there; you'll want to clean it too for maximum filtering. Overall should work good... a good version of this:


  3. #3
    spideybry's Avatar
    Join Date
    Jan 2011
    Location
    USA
    Posts
    142

    Re: My nano overflow/header design

    How do you account for top offs? Manually or do you have some sort of ATO built on there. I am setting up a nano and I would like to use a variation of this but I don't know if topping off will be an issue or not.

  4. #4

    Join Date
    Dec 2010
    Location
    uk scotland
    Posts
    47

    Re: My nano overflow/header design

    I've covered it to reduce evaporation as much as possible but have marked a line in the header. Simply pour in and fill to line.
    Have checked and theres been no noticable change in level so far (3 days) so I doubt I'll be looking at much over 500ml a week tops.

    I made the calculated the header size so that it contains 14lt (i think it was, will have to recheck). Means I can do a 10lt water change (10 lt marked bucket) without disturbing display tank like youm would a proper sump.

  5. #5

    Join Date
    Dec 2010
    Location
    uk scotland
    Posts
    47

    Re: My nano overflow/header design

    just a quick update.

    The scrubber is working well, plenty growth and levels are near zero.

    The acrylic has started to bow and is pulling at the silicone which is starting to fail.

    Because of this I have bought a new tank and am redoing it but using a glass panel and secured the acrylic sheet to it.

    This one is alot more shiney and perminant than the first one.

    Will post pics later!

+ Reply to Thread

Thread Information

Users Browsing this Thread

There are currently 1 users browsing this thread. (0 members and 1 guests)

Posting Permissions

  • You may not post new threads
  • You may not post replies
  • You may not post attachments
  • You may not edit your posts